Wednesday 30 May 2018

WOYWW #469: ATC galore and other things

Today marks the first week of the 10th year that WOYWW has been running! If you thought we made a big deal out of the 9th anniversary, wait until the 10th anniversary comes along in exactly 51 weeks' time! But we still have a lot of desk sharing to do before that, so let's not jump ahead of ourselves!

I temporarily moved my work station down to the kitchen this week for some serious tea staining activities. Here I am in the middle of mass producing some artificially aged paper.


This activity added to my growing collection of used tea bags. I'm still not entirely sure what I'm going to do with them, but I trust the inspiration will strike when I need it! You can also see my latest attempt at sprouting an avocado stone - I'm doing all the right things, so hopefully it will work this time. I'll keep you posted. For now I'll just show you the end result of my tea-dying endeavour. Don't you just love these crinkly pages?


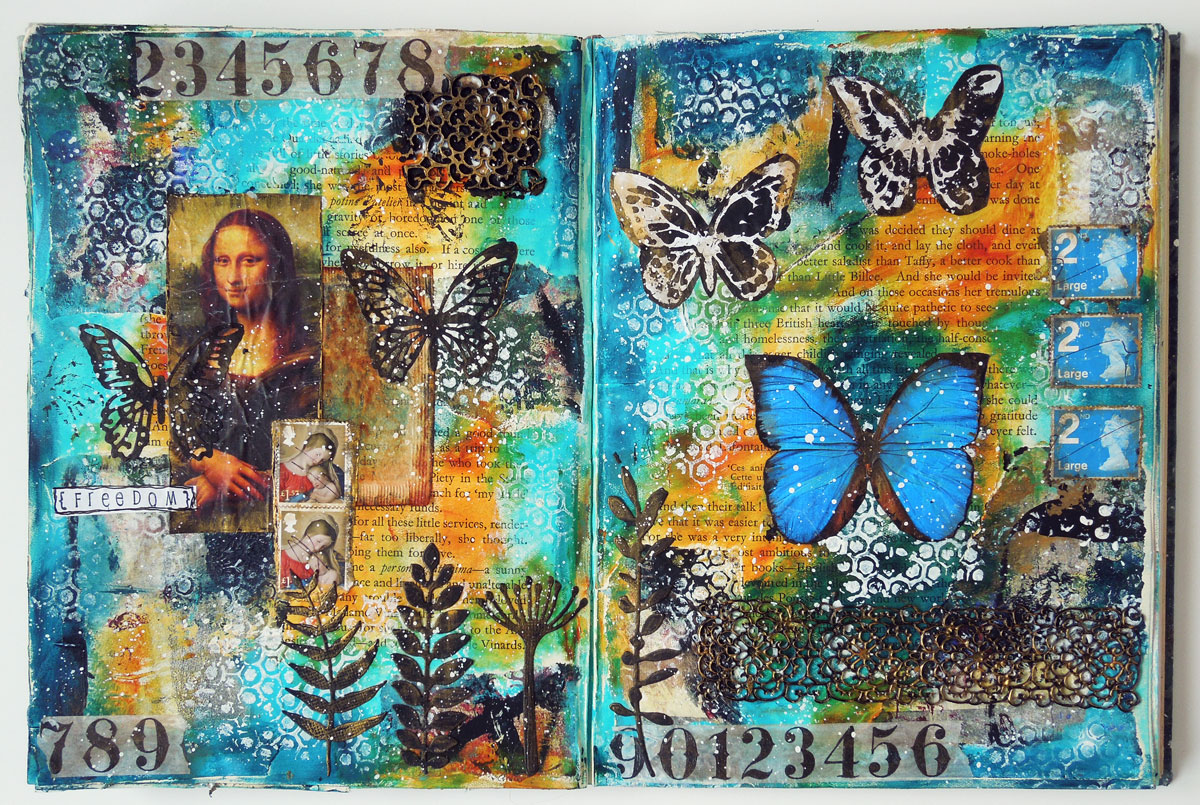
Now let's move on to more important things. I can't wait to show you all the ATCs made and received for the 9th WOYWW anniversary swap. I'll start with the ones I sent out. I tried to make them all a bit different but with the same technique - even the butterflies in the first and last card are different if you look closely, as they were cut with different dies. I don't have a large selection of dies, so I made the most of what I have.


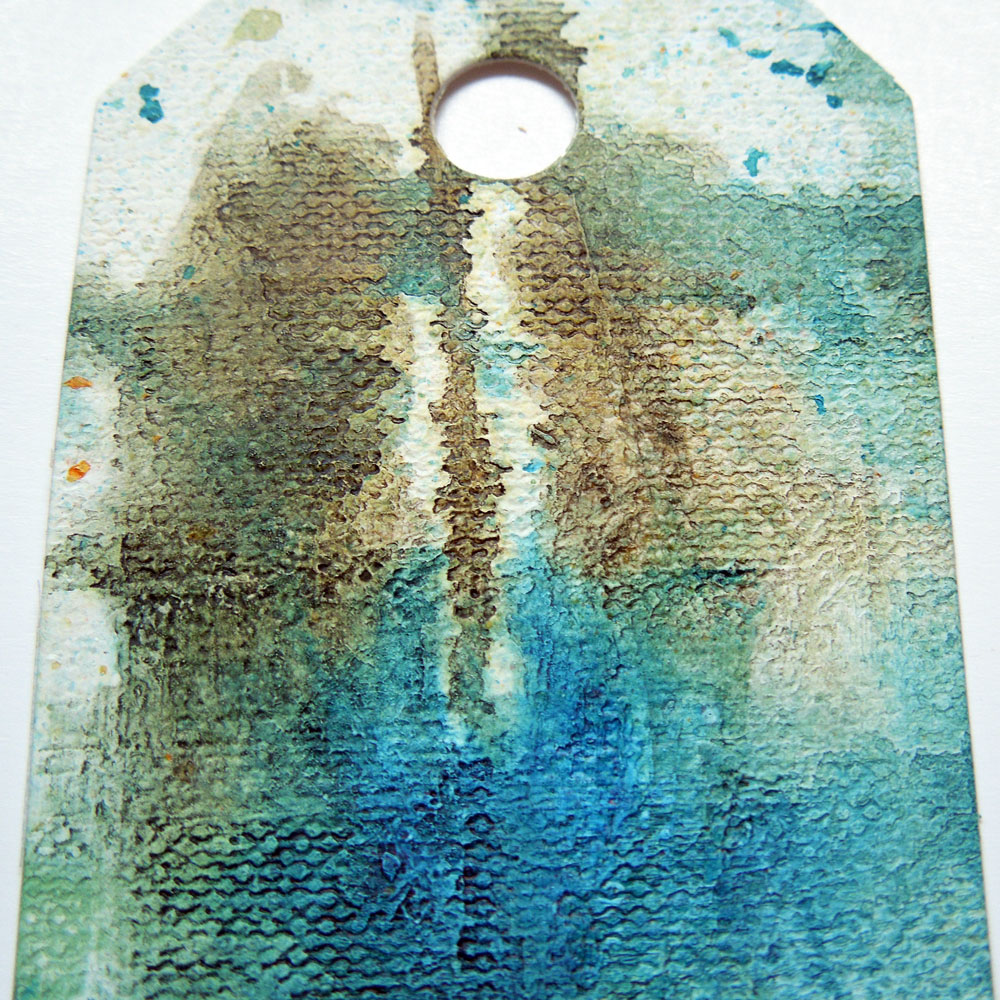
I've also made some tags to use as note cards - and some matching envelopes:


This year I swapped with Shaz, Neet, Heather, Sarah, Diana and LLJ. I was Kyla's PIF and Margaret was my PIF and I also sent out a couple as RAKs - I hope everyone's received  them by now! 

Here are the ATCs that I received. They all arrived within 24 hours of each other - the postman must have thought it was my birthday! Thank you so much ladies - each and every one of them is very special to me! This was such a fun swap - we must do it again next year! 


Some other bits and pieces to show you (envelopes, cards, arty papers) - I'm keeping everything as souvenirs! 

I have one more photo to share (ok, two)! I caught this sunset a few days ago - this is how it came out of my camera - I swear I didn't exaggerate the colours in any way and it was even more striking in real life on the "big screen".


And here's the obligatory photo of Oreo - I take a lot more photos of him than I take of my other family members - at least he never complains when I shove a camera in his face and he's a natural poser!


Thanks for visiting! I'll be around soon!
Happy #469!

Monday 28 May 2018

Playing with acrylic inks

What I like about acrylic inks as opposed to watercolour and distress inks is that they are permanent. While I absolutely adore watercolour textures, sometimes I find it frustrating that they can reactivate and therefore are not always suitable for mixed media applications. Watered down acrylic inks can produce similar results, but once they are dry, they will not go anywhere so you can freely use them as backgrounds.

For my latest project, which I'm not ready to share yet, I've been using acrylic inks to stain cardstock and other elements. Instead of my craft mat (or rather on top of it), I used a piece of textured white card as my work surface. At the end of the process, I got a lovely, grungy piece of paper that I was able to cut into note cards and tags for further use. Unfortunately, in my excitement, I forgot to take a photo of the palette paper before I cut it up, but I can show you the bits and pieces I ended up with. I would have never been able to produce such beautiful, random textures on purpose!


Here's a closer look at the textures: 


I only used three inks to achieve all this: Daler Rowney's Sepia and Prussian Blue and Golden's High Flow Quinacridone Nickel Azo Gold. 


These are only the by-products of a bigger project, which I will share in the coming days/weeks. Happy Bank Holiday to my UK readers and Happy Monday to my visitors from overseas! xx

Saturday 26 May 2018

Tim Holtz-style Tiny House

I've been eyeing the tiny houses on Pinterest made with the Tim Holtz Sizzix die for a while now and I really wanted to make one, but I couldn't get myself to shell out ££ for something that I would probably only use a handful of times. These tiny houses are actually quite simple to cut by hand, which is what I ended up doing using cardboard from recycled packaging. Can you tell the difference?


I used Kroma crackle medium for the walls and a piece of punchinella to texture the roof with heavy-weight gesso, as I ran out of texture paste. I find the Kroma frustratingly long to dry, but otherwise it produces nice crackles. I need to find a crackle medium that does the same job but dries much quicker. Let me know if you have any suggestions! I decorated all sides with die-cuts, a printed image and some words cut from a book. I did not look for any specific text - I just used whatever I stumbled upon! I believe in serendipity! Here are some more photos of my first tiny house:


This was a fun and easy project to make - I will definitely make more of these tiny houses when I get around to it - they look their best when they are in a group. Happy long weekend, everyone!

Wednesday 23 May 2018

WOYWW #468: Happy 9th Anniversary!

The much anticipated 9th anniversary of WOYWW has finally arrived! Number 468 - isn't that unbelievable? That's 9 X 52 weeks of blog hopping hosted by Julia Dunnit on the Stamping Ground. I first joined in at #276 in September 2014 and have been a regular (on and off) ever since. Here's a look at my desk earlier this week:


I was working on some tags to send out with my ATCs for the anniversary swap and gelli printed some envelopes as well, while I was at it. I'll keep the final look under wraps until next week by which time they will have been received. It's been lots of fun working on a batch, which I don't normally do.

Now onto some of my experiments this week! I've recently bought some metal filigree embellishments from China and the idea struck me that I could turn them into stamps! I ran them through my Big Shot with a piece of foam, just like I did with the plastic packaging last week. It couldn't have been easier and I instantly made several new pattern stamps to use in my journals and other projects! You can use them with archival inks or acrylic paint as shown below.


Another thing I experimented with was string painting. I spotted a video that Shaz (Silverwolf) shared on Facebook and had a go. It's remarkably easy and I got good results straight away. I used acrylic ink in an A4 notebook. The best thing is that you get two pictures for the price of one - the mirror images of each other. The results are unpredictable and random, which is part of the appeal of this technique. 


I've been working on some other things as well, but they will be the subject of a separate blog post. For now, I'll just leave you with a couple of Oreo photos. He likes to be outside these days but luckily, never strays too far from the house.


I will be sending out my swaps tomorrow as they need some final touches. Hopefully they'll arrive by the end of the week as they're all UK addresses and I look forward to finding out who my PIF is later today. 

Happy 9th anniversary, everyone! Long live WOYWW and a big THANK YOU to Julia for making it all possible! 

Wednesday 16 May 2018

WOYWW #467: Altered paint brush

Only one week to go 'till the 9th WOYWW anniversary and ATC swap! I'm definitely feeling the buzz - do you? I've got my ATCs finished and ready to go. See, I can get my act together if I put my mind to it!

I've been quite busy in my craft room as well. This desk shot was taken on Friday when I did some midnight arting - something I hadn't done in ages! I've since posted this project - if anyone wants to see how it turned out, you can find it here. I love it when Oreo just sits there and watches.


However, today I'm going to show you something else: an altered paint brush! When I saw this blog post by Finnabair, I immediately knew I had to try it and I had the perfect brush for it as well. You might recognize those wings from an earlier post. I used diamond glaze to stick down my elements, followed by black gesso and metallic paints. I was quite impressed by the results and how easily it all came together:


I will also give you a sneak peek at my ATCs - just to prove that I have done them. Perhaps a side view of the stack is not too much of a spoiler.  


And here's a photo of my underpaper to show the colours I used. I sometimes get more excited about the underpaper than the actual projects! (not to say that I'm not excited about the ATCs - I am!) 


Happy Wednesday!
I'm free to visit today so I'll be around shortly!

Sunday 13 May 2018

Journal page: Freedom

This is my first free weekend since January and I used my new-found freedom to make a journal page. I haven't made one in absolute ages and it felt so good to just let loose! I used my altered book and went berserk with collage and colours! This is the result of my abundant play:


Here's a list of some of the collage elements I used:
  • palette paper (torn into pieces)
  • printouts (left over from other projects and scrunched up for added texture)
  • used postage stamps (distressed)
  • used teabag
  • die-cuts (butterflies and plants)
  • washi tape (numbers)
I also included some lace pieces made with a silicone mould. These were just some experimental pieces lying on my desk that suited my project perfectly. One of them was made with gel medium, which I painted black and then accented with gold - the other is left-over black gesso with gold highlights. These moulds are marketed for cake decorating but they work just as well with acrylics to create amazing distressed textures for mixed media projects.


Another clever "hack" I discovered is a piece of plastic that I turned into a texture stamp. I was cooking dinner and was about to throw away the plastic chicken tray when the design on the bottom caught my eye. It looked like something Tim Holtz might have designed LOL! I cleaned it, cut it out and ran it through my Big Shot with a piece of foam and, voila, I got myself a fantastic new texture stamp!


Here's my page in more detail to show the individual elements:


I normally gesso my book pages before starting a new spread, but this time, I didn't. This resulted in some words from the underlying text being clearly visible. After taking these photos, I circled some of these words and thought about how they're relevant to my life. The words that jumped out at me were: gravity, gratitude and homelessness. Homelessness in particular made think about how I'm no longer Hungarian but I'll never be fully British either - culturally, I'm somewhere in-between the two and I'm not sure I will ever feel truly at home in either of my countries. This is not necessarily a bad thing, but I'll have to be aware that I will always appear a bit alien to people in both cultures. 

Thank you for coming along on my art journey this Sunday!
Enjoy the rest of your weekend! xx