Wednesday 30 December 2015

WOYWW #343: Only two days left of 2015!!!

It seems like yesterday I wrote my last WOYWW post of 2014! Where did the year go??? So much has happened in 2015, good and bad in equal measure, but that's what life is all about, isn't it? We have to embrace the 'bad', accept it and try to make something good out of it. Nothing is ever perfect and never will be. But we can still find happiness through it all. Happiness is a mental state - it doesn't just "happen" to us - otherwise it would be called "happeness" LOL!

Well, I didn't plan to be so philosophical with this post, but at the end of the year we all inadvertently take stock, look back, evaluate and hope the following year will be good. Or at least, not bad. I'll settle for not bad. That's good enough for me! I don't ask for much.

I guess you're here to look at my desk for WOYWW. I had to clear it for the holidays, which allowed us to play a game of scrabble on Christmas day. I'm sharing a snapshot of this scene as there's nothing else of interest on my desk at the moment.


As you can see, Oreo decided to take part in our scrabble tournament and was almost able to spell 'steal' - one of his favourite words! I swear I didn't stage him on the table for the sake of the photo! I just didn't want him to feel left out, so I gave him some letters when he planted himself in that box. 

I haven't done much in the way of arting during the holidays. If you remember my last post, I had run out of gel medium, which prevented me from binding my LifeBook. Luckily, I got it on Christmas Eve, so all my LifeBook pages are now permanently attached to scrapbooking papers. This sounds so easy but it was quite a big job! I made a cover and punched holes for the binding rings as well.  Now I have to wait yet again for the rings to arrive, as the ones I have are too small. It is one heck of a chunky book! You can see some snapshots of it below. I'll do a proper flip through as soon as I can put it together, though I've just realized the rings I ordered are coming from the US, so it might be weeks before they arrive! If only I had been better prepared!


In the meantime, I had some digital play with my pages and made this video in After Effects. I used a template called Stairway of Memories" and just added my photos to it. Hope you like it!


I'm taking my son to the cinema this afternoon to watch the new Star Wars movie, so I might be a bit late with my rounds. Please bear with me and I'll get around to visiting everyone who leaves a comment eventually! 

Wishing you all a wonderful 2016!

Wednesday 23 December 2015

WOYWW #342: Last minute link-up

Hey, Deskers! So here we are two days before Christmas. I'm a bit late to join WOYWW today as I've been super busy, but managed to make it in the end. Uncharacteristically, I'll be short today - or at least I'll try. Here's a photo of my desk taken last night.


I was working on binding my LifeBook, which involves attaching a sheet of  scrapbooking paper to the back of each page leaving a 1" border for the binding rings. See that 500 ml gel medium jar on my desk? I went through the whole lot and I only got halfway through my pages. OK, it wasn't full to start with, but still, that's a huge jar! I ordered some more from Jackson's but I very much doubt it will get here before Christmas. I was too stingy to shell out £5.00 for next-day delivery and now I'm regretting it.

Here's the empty jar this morning, along with a sneak peek at half my LifeBook stack. That's about 20 pages, with 20 more to go. The other half is still in a box waiting for the gel medium to arrive so I can proceed.


I promised to be short and I'm already over-stretching your patience, I know, but I can't resist sharing another photo of Oreo, who's been "helping" me wrap some presents. I hope your Christmas preparations are well under way. I'm wishing everyone a peaceful Christmas and lots of creativity in 2016! Thanks for stopping by today! Hope to see you all again soon!


Monday 21 December 2015

LifeBook Catch-Up Week 15: Ghost Girl

Ghost Girl wasn't really the name of the lesson, but mine turned out a bit ghostly looking. Or as my husband and son described it 'freaky' LOL! This was one of Tam's lessons way back in April, which I missed back then but I really wanted to include it in my LB 2015.

Tam showed us how to do a more painterly portrait with a reduced colour palette coupled with some more colourful intuitive painting for the background. I really like the right hand side of my painting and that style is something I will want to explore further. I'm not sure about the rest of my painting though but at some level the two parts seem to work together - or at least I pretend they do!

This may be my last 2015 project for my LifeBook as I expect the binding lesson to be published later today! I can't wait to see all my creations in one book and I plan to dedicate a separate blog post to it, hopefully before the New Year.


Wednesday 16 December 2015

WOYWW #341: Midnight Arting

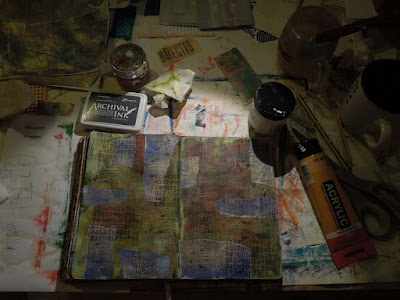
I'm here again to share my desk with my fellow WOYWW-ers on Julia Dunnit's blog, The Stamping Ground.  I'm warning you, it ain't pretty! I actually took two photos, one at around midnight and another at exactly 42 minutes later, or so the camera information tells me.

I was ready to go to bed after watching a couple of episodes of Grey's Anatomy on Amazon, but Oreo perked up just as I was locking up, and went berserk running around after having slept all day. I thought I'd better stay up with him for a while and let him tire himself out before locking him in the conservatory where he's supposed to sleep. While waiting for him to calm down, I occupied myself by working on two journal pages. I'm not sure where either of them are going at this point. Here's the double shot of my messy midnight work surface:


And here's culprit responsible for my late night arting session, in a more relaxed state earlier in the day. He's found the softest bed throw in the house!


I've also got some completed art to show you. I made a journal page using some of those TCW stencils I showed you last week. I got into a pickle with the composition, which often happens when I use circles, for some reason. Perhaps I should have thought this through a bit more.


And I've also done three more of those altered 'angel' cards I introduced last week. These are just the right size for quickies to jump start my creativity. The photos show front and and back views.


Flip side of cards
Thanks for stopping by today!  Happy WOYWW! Hope you have fun for the rest of the week!

Tuesday 15 December 2015

Journal page: Pear-shaped world

Today I'm sharing a journal page and linking to Carolyn Dube's link party Let's Play.  I encourage everyone to take part!  It's fun to share and visit each other's posts for inspiration. If you don't have a blog, no problem, you can just link to a photo or even upload one through the linky tool.

My page features a painted pear and some gelli printed hearts. I was going to use my new pear stamps instead of the hearts, but it would have been too many pears! I liked the imagery of the hearts, but I realized that my page made no sense - until I came up with the title, which ties the two together!

Note: I'm not sure if the idiom 'go pear-shaped' exists in US English - in British usage it means 'go wrong'.

When you don't plan your pages before hand - and I very rarely do - it's easy to corner yourself and get stuck in a dead end, but it's so rewarding to be able to get out of it! Enjoy your week!


Let's Play!

Monday 14 December 2015

Image transfers on polymer clay

I saw a project featuring an image transfer on polymer clay the other day and I was so intrigued, I couldn't sleep or eat until I'd found out how it's done. Below are the results of my internet research and my first attempts at this technique.


There are at least three ways you can transfer an image onto polymer clay. I've tried the first two and will be trialling the third as soon as I get my supplies in the post.

Method 1: Laser printout of image + water

This is by far the easiest image transfer method: all you need is a laser printout (or photocopy) of your image and some water. You place the image face down on a sheet of unbaked clay and then gently remove the paper by rubbing it with wet fingers. No medium is necessary! The polymer particles in the clay bond with the toner particles on your printout. This method will not work with an inkjet printout, unfortunately, but you can always make a photocopy of it.

When all the paper has been removed, bake as per manufacturer's instructions. Apply some varnish when it has cooled down. I used matte mod podge and it worked really well. You can also use a glossy or satin varnish or resin.

Below are two of my attempts - one of my digitalized gelli prints and a famous image off the internet courtesy of National Geographics. They are both pendant size clay pieces, so the images had to be reduced accordingly. It's best to use white or light coloured clay for this technique, otherwise the dark background will show through.


Gelli print transfer on polymer clay with water

Image transfer on polymer clay with water

Method 2: Laser printout of image + rubbing alcohol

This method works on the same principle as above but instead of water use some rubbing alcohol applied with a piece of cotton wool. Do not rub the paper off, but rather burnish the back of the image until it is transferred and gently peel off the paper. You can use the back of a spoon to help you, just be careful not to distort the clay. You may have to leave your image attached for 10-15 minutes and apply the alcohol soaked cotton wool several times before the image is transferred. I almost gave up, but it worked in the end. You get a more distressed look with this technique than with the water transfer.

Here's my result using an image of Mona Lisa (thanks Leo!).

Image transfer on polymer clay with alcohol

Method 3: Heat transfer paper + liquid clay

I haven't tried this method yet but it involves printing your image on heat transfer paper and then coating the printed side with liquid clay  and baking it. The heat transfers the image onto the clay film, which you can then stick on your project. I will be trialling this method soon and posting my results.

Please let me know if you have tried any other image transfer methods on clay in the comments below! Have fun playing and creating!

Wednesday 9 December 2015

WOYWW #340: Altered cards

Happy Wednesday again everyone! Time to gather over at the Stamping Ground for another round of WOYWW.  The photo shows my desk yesterday afternoon. It is somewhat staged, as you couldn't see anything otherwise in the big heap of mess. I'll walk you through the items of interest quickly:


In the middle is a new layout in my journal which you can take a closer look at here.

On the left are a couple of new stencils that came from the US. The fish ones I first saw on Angela's blog here and absolutely had to have them!

On the right is the packaging of some new stamps from Crafty Individuals. They sent me quite a few free ones with my order! I was so pleased! I will definitely be ordering from them again!

Top right is a sketch and notes for a LifeBook lesson. I still have a few weeks to work on some of the lessons I missed earlier that want to include in my book.

In the top row you can see a set of tarot cards I picked up at The Works over the weekend, along with an angel deck of 50 cards. I bought these with the intention to alter them. I already had a go at one of the angel cards. I wanted to see if they take paint OK - they do! I will be working on these in batches. For now, I'll just share the prototype. I don't believe in 'angels' as such but I do believe in positive forces in our lives. My plan is to take an inspirational phrase or word from each card and build my imagery around it. The first one says "Allow yourself to be inspired". I covered the flip side with a gelli print. Here's what it looks like front and back. They are about 4" X 5.75" in size.


And finally, here's a photo of Oreo, who's getting bigger every day and claiming more and more space in our house. So much about not letting him jump on the beds! He practically owns the place by now!


Thanks for visiting today! May your week be filled with creativity and happiness! TTFN!


Tuesday 8 December 2015

Journal page with a modeling paste stamp

It's Tuesday again, so it's time to link up with Carolyn Dube's blog party Let's Play.

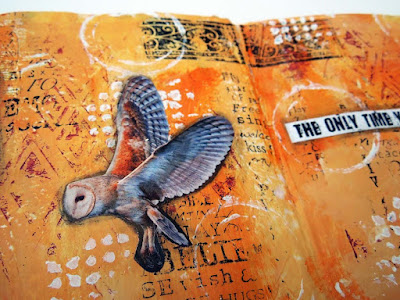
On this spread I experimented with a stamp I made from modeling paste and a stencil. The idea came from Carolyn's mini class 'Modeling Paste Stamps' which you can find here. This technique gives the stencil patterns a completely different look - kind of weathered and distressed. I'm sure I will use this method a lot in the future. Can you spot where I used the modeling paste stamp on my page?


This is the modeling paste stamp I used for this page. It was made using a Crafter's Workshop stencil and Liquitex Flexible Modeling Paste on black card. I used a brayer to spread the paint on top of the stamp. You get a different look if you apply a thicker layer of paint with a brush. You can reuse the stamp as often as you like, and you can even incorporate it in your artwork later with all the wonderful paint layers on it.  
Stamp made with modeling paste