Sunday, 10 June 2018

Die-cut journal with pockets and tags

I've finally finished my "mystery" project that I had shared bits and pieces of previously.  I can now reveal that I have been working on a pocket-size journal cut with the Eileen Hull Passport Journal Scoreboards XL Die. I don't often buy such expensive dies, but this one seemed good value, given the fact that it has the cover, spine and inserts all included on one die. I didn't need to buy the extended cutting pads either as the shapes are arranged so you can cut them in two separate passes. Also, the album cover is just the right size for making tarot cards, affirmation cards, postcards, journalling cards, etc. which is an added bonus. I would never be able to cut chipboard by hand with such perfectly rounded corners, so it is a very versatile die to invest in.

Here are the shapes I cut for the journal before I assembled it. The covers and the spine are coated with Basic Grey patterned paper - I still have a few sheets in my precious collection from years ago. The inside chipboard pages are coloured with acrylic inks and I also cut some inserts from tea stained regular printer paper.


Here's the journal after I assembled it and added all the bits and pieces: pockets, tags, labels, tickets, charms, etc.  I left most of the inner pages blank for journalling except for some random stamp marks here and there.


Here's a quick video flip-through:


I'm linking this post with this month's Mini Album Makers Challenge


Friday, 8 June 2018

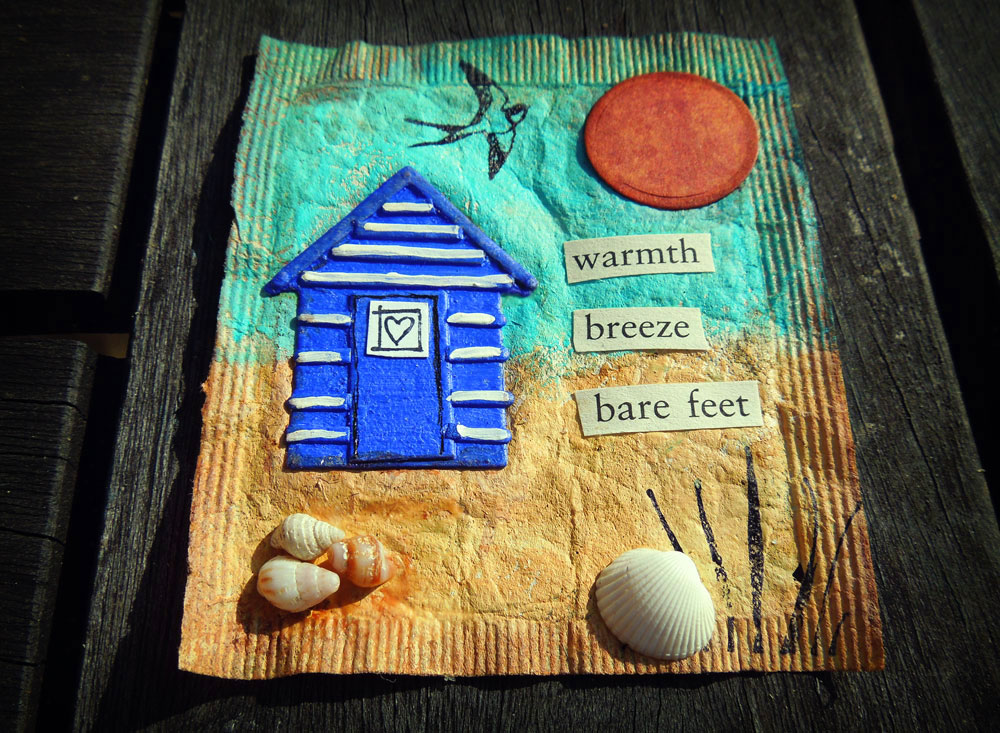
That's Crafty Challenge: Summer collage on a tea bag

I don't often take part in challenges, but I was inspired to enter this month's challenge by That's Crafty. The subject is 'summer' and I had just the perfect project in mind. I absolutely love beach themes with sun, sand, sea and, of course, beach huts!

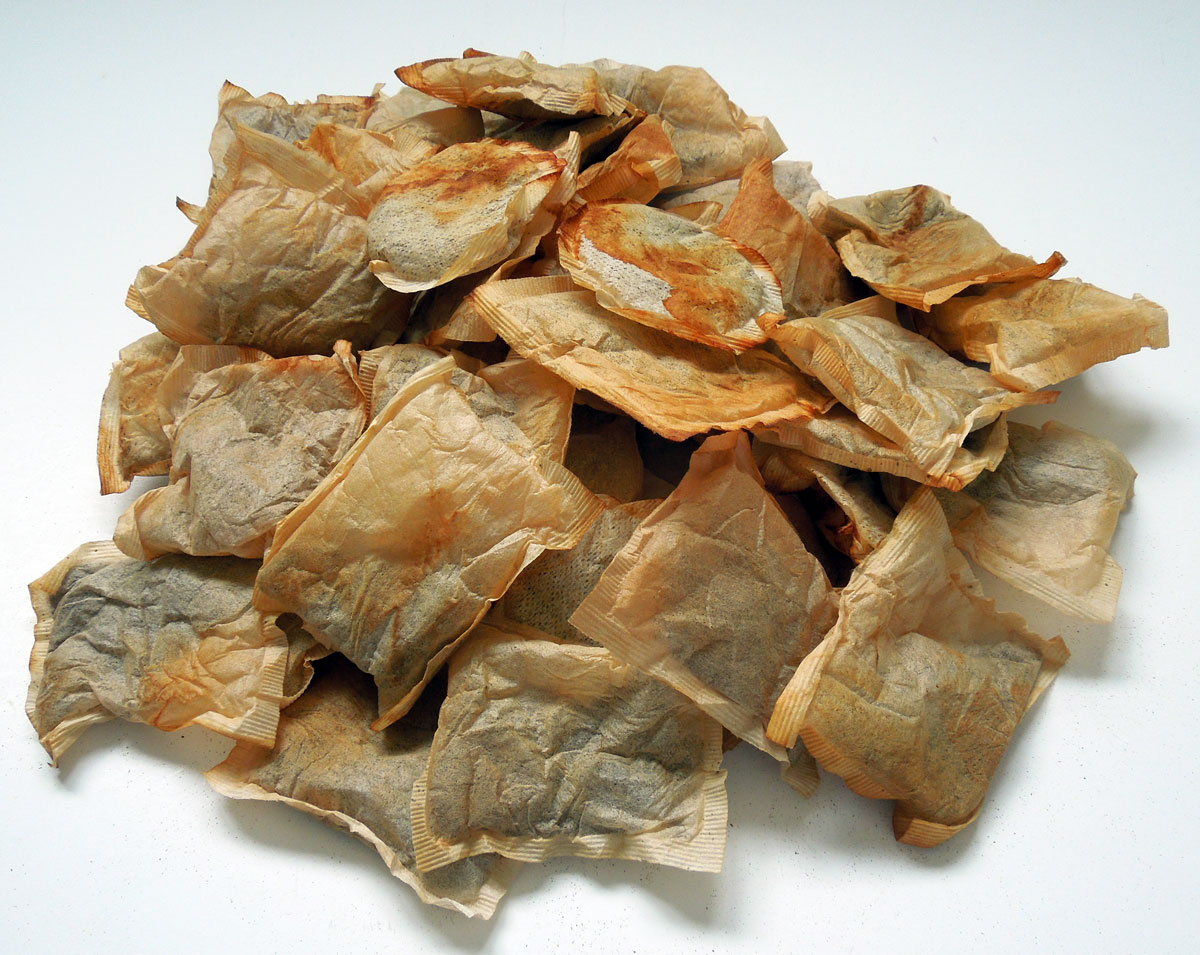
I chose a used and empty tea bag as my canvas. It's the same width as an ATC, just a little shorter - perfect for a small collage. I added a layer of heavy gesso with a palette knife to partially seal the surface, otherwise the paint would just run through it. I painted the sand with Golden's quinacridone nickel azo gold mixed with gesso and colored the sky teal blue. The beach hut and the circle for the sun were die-cut. I also added some stamping and tiny, real sea shells that I had picked up on holiday years ago. The collage was finished off with some found words cut from book text. I'm still amazed how the right words always jump out at me - it only took a couple of minutes to find these and they were all on the same page!

Tea bags have such a great texture to work on and I love the little border where the two layers are sealed - I always make sure that the border remains intact when I cut the bags apart. It's a good idea to iron them before applying paint if they're too crumpled. Here's my little summer scene and some close-ups to show all the details:


I really enjoyed working on this mini project and I'm planning to make a whole series of tea bag collages. They are really very similar to ATCs and it's probably best to work on more than one at a time and display them together, but this is all I had time for today. I'll call it my prototype. I have plenty more beautifully stained tea bags to work with! 

Thanks for your visit! Happy summer!

This challenge is open until the 4th of July for anyone to join.

Wednesday, 6 June 2018

WOYWW #470: Dry embossed hearts on mountboard

I don't know if it's just the time of year, but there's so much inspiration out there, I find it hard to keep up. I have several projects in the pipeline to be finished or even started but I keep dropping them and even forgetting about them when something else catches my eye and sparks my creativity. It could be that I'm just scatty, but I tend to go with the flow and do whatever tickles my fancy.

Here's a photo of my desk to demonstrate my scattiness (and messiness) to share with my WOYWW readers. Oops, you can even see my long overdue mystery project there - to be unveiled later in the week. It still needs some finishing touches. I was working on some heart ornaments inspired by Sarah's Craft Shed. I wanted to see if it was possible to emboss thick mountboard with stencils to achieve similar results to using embossing folders and I'm happy to report that it works really well!


I cut the hearts from 1.5 mm mountboard (known as mat board in the US) which is pretty much the maximum thickness the Sizzix Bigz dies can handle. Then I just ran them through the Big Shot with a stencil on top and the pattern embossed beautifully. I applied black gesso as the first layer, followed by a layer of gold acrylic paint and turquoise blue or green acrylics on top. You have to wait for each layer to dry sufficiently before adding the next.


Then I took a wet baby wipe and carefully removed some of the paint to partially reveal the underlying layers. The texture will look similar to weathered bronze.


On second thought, I made an identical set and stuck two and two together with a piece of string in-between for hanging as ornaments. I painted the edges gold. 


I used the same technique to make this ATC but with die-cut shapes instead of embossing:


That's it for this week, dear Deskers! There's only one thing left to share - yes, you've guessed it right - Oreo! Here he is sleeping peacefully and contentedly in the middle of the day. Life's so hard when you're a cat!

Happy #470! I'll be around visiting soon!


Monday, 4 June 2018

Klimt inspired mixed-media canvas based on a lesson by Ivy Newport

I've been trying to keep up with all the inspiration online for the past few weeks and ended up with a growing list of "must try" techniques and projects on my to-do list. When I saw this free lesson by Ivy Newport, I couldn't resist it -  I had to jump straight into it, abandoning all my WIPs!

It is a deceptively simple and quick project. I chose an 8" X 8" canvas as my substrate and started out by adhering a tissue background with an old map print. (Ivy used a patterned napkin, but I didn't have anything suitable.) I used the same girl figure that Ivy shared with us as I really liked it. I cut a circle from patterned paper, being mindful that these will represent my main colours. This is what my collage looked like at this point:


On closer inspection, I should have made sure that the grid in the print lined up with the edges of the canvas, but it doesn't really matter as most of  the background got covered up in the process, anyway. 

Next, I painted over the background with a mixture of gesso and Golden's quinacridone nickel azo  gold acrylics, which reflected the orange tones in the patterned paper beautifully. For the dress I chose a pretty ultramarine violet to echo the little flowers in the patterned paper. At this point, it already looked pretty good because the colours worked so well together! 


After this layer was dry, I added a pattern to the dress in a darker shade of violet/blue and a bit of gold to channel the style of Klimt and finished it off with some doodling, following Ivy's prompts. Here's is the final picture: 


You can see better how the gold shimmers from this angle:


This angle show how the image wraps around the canvas:


Here's  gif  to show whole process again:


This was such a fun and satisfying lesson!
Thank you Ivy! 

Friday, 1 June 2018

Playing with Acrylic Skins

I came across Carolyn Dube's ground-breaking video the other day and the proverbial light bulb went off in my creative mind! Carolyn used her left-over poured paints on the gelli plate to create some really cool acrylic skins. I didn't have any left over paint to use up but I did have a bottle of Liquitex pouring medium that I bought years ago and never used.

You can try this technique, even if you don't have a gelli plate. All you need is a non-stick surface like a silicone mat, so you can peel off the skins when they're dry. Even a piece of acetate might be suitable, but I do recommend a silicone mat.

This is what my work surface looked like during the experiments:


Firts, I made some random puddles with the pouring medium mixed with a few drops of  acrylic ink. I dunked the mini gelli plates into the mixture - very much like Carolyn did with her left-over paint and let them dry. There was still plenty of inky medium left on my mat, which I then left to dry as well. If you notice any thin areas on your plates or in your puddles (Carolyn called these "bold spots" LOL!") you can always add a few drops of pouring medium to patch them up. The white areas in my photo show where I added more medium - this is also good for thinning the inks and making the skins more transparent. You can also see some leaves on my mat. These are skeleton leaves, which I dipped in the inky pouring mixture and simply let dry on my mat. It took overnight for everything  to dry completely.

I was so excited, it's a miracle I was able to sleep at all! The next day, I was able to peel my acrylic skins off the gelli plates and the silicone mat quite easily. I was also very happy to see how well the leaves turned out.


You can use the acrylic skins as window clings or you can do all sorts of other fun stuff with them, like die-cutting! If you place the acrylic skins between two sheets of wax paper, you should be able to die-cut them. This may not work if your skins are too thick for your dies, but I was able to cut mine with the Sizzix Thinlits. Here are some of the shapes I cut from my skins:


I used these shapes to decorate some tags and journalling cards I'd created earlier. I used the same inks for the skins, so they co-ordinate perfectly. This wasn't intentional, but those inks just happened to be still sitting on my desk when I tried this experiment! A lucky coincidence! Here are the finished elements, which will be part of a larger project to be unveiled later!


I used found words cut from a book on these tags and cards, which is a favourite technique of mine when I'm lost for words. Here's a closer look at some of them. 


Huge thanks to Carolyn for the inspiration!
Happy experimenting!